What’s the best part of my day?
Being with my little girl and her classmates at an all day excursion to Whiteman Park. Kangaroos, native australian birds, bush land, native trees and plants, wild flowers, bugs, big orange ants that bite, native bees (I was stung on my neck), spiders (a couple of kids were bitten), snakes (lucky nobody met one in person)…….the list goes on and on.
What’s the worst part of my day?
Being powerless to her help when she was bitten and scratched by bugs and then when her eyes were swollen and itchy from the pollen on the air (it’s spring).
What have I learnt about myself?
That I love detail.
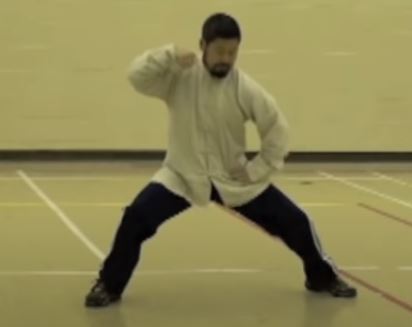
In my practice, detail is very important. I might even go as far as saying critical.
Imagine walking through a forest without a map or having any idea where you want to go. Lost right?
Well practicing my Yilu is exactly the same. Without the detail of principles, theories and methods I can pretty much do anything.
It’s just like as if I was to drive off in my car without a map or destination in mind. Just meandering around, burning fuel.
Detail such as:
Don’t move
In with elbow no hand, out with hand no elbow
Rotate
Fix the point
Keep the centre
Yin Yang separation (splitting)
Eat bitter
and many many more.
My current personal challenge is to test the theory of 10,000.
My master, Chen Zhonghua said to me that my body will change after 10,000 Yilus. Apart from stipulating 20 Yilus daily, he didn’t recommend whether I would benefit from this theory if I was to spread out my practice over 10 years or whether it had to be done consecutively.
So I made it mean consecutively.
It takes me approximately 1 hour to complete 10 Yilus.
I’m in week 37, so after completing this week I’ll have 6300 Yilus to complete.
So what’s your journey?
Can you apply the rule of 10,000 to your craft or discipline?
Reach out and let me know.
On target, 20 Yilus today.
Thanks for sharing.
Talk to me on: gawain.siu@gingmo.com.au
Checkout other blog posts on my Medium: https://medium.com/@gawainsiu